You are struggling to achieve clean, consistent results with MIG welding? Thin metal can easily warp, burn through, or produce weak joints when the technique or settings are off. Many beginners and even experienced welders face these frustrations. This guide helps you understand the essentials and improve your results step by step. Whether you want stronger welds or better control when MIG welding thin metal, the following sections will walk you through the key ideas and practical insights.
What is MIG Welding?
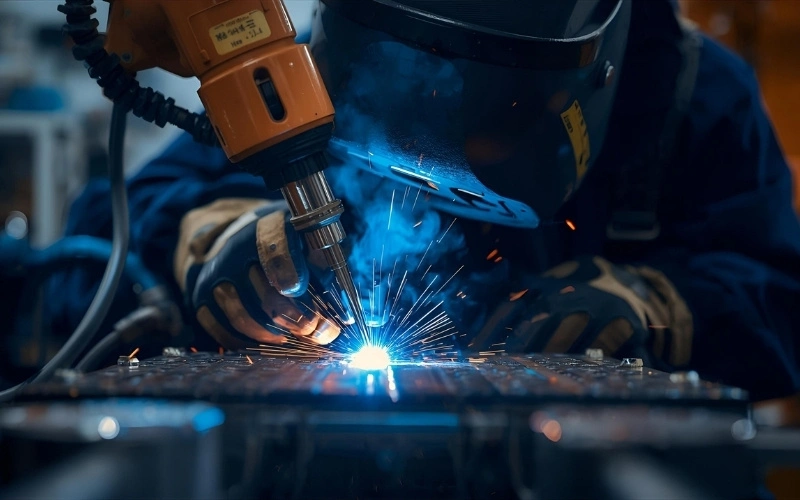
MIG welding, or Gas Metal Arc Welding (GMAW), is an arc welding process that uses a continuously fed wire electrode through a welding gun connected to a power source and wire feeder. An electric arc melts the consumable electrode and base metal, forming a molten weld pool protected by shielding gases such as argon, carbon dioxide, or argon–CO₂ mixtures to prevent atmospheric contamination and maintain weld penetration. With DCEP polarity and controlled voltage, amperage, and wire-feed speed, MIG welding delivers high deposition rates and fast travel speeds. It is commonly used for carbon steel, stainless steel, and aluminum in automotive manufacturing, construction, and metal fabrication. Issues such as spatter, porosity, and insufficient penetration require proper joint preparation, appropriate shielding gas selection, optimized metal transfer modes, and safe equipment setup, including welding helmets and protective gloves.
Read more: Top 5 Methods to Master Welding Sheet Metal
How to MIG Weld Thin Metal?
The process of MIG welding has 4 main steps, including:
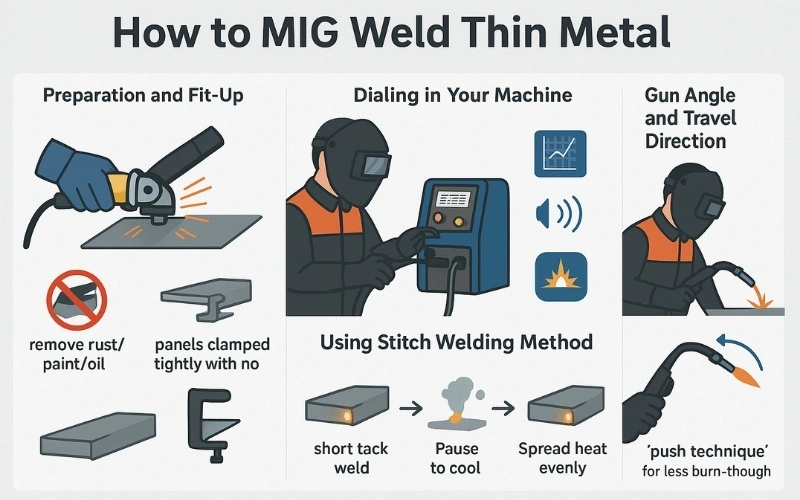
Preparation and Fit-Up
On thick metal, you can sometimes get away with less-than-perfect prep. On thin metal, it’s non-negotiable.
- Cleanliness: Grind the weld area to a clean, shiny metal finish. Make sure to remove all paint, rust, primer, and oil before welding.
- Gaps: Your panels should fit tightly with no space between them. Gaps are the primary cause of burn-through because they stretch the arc, generating excessive heat and preventing a steady weld puddle. Always clamp the panels securely so they sit flush together.
Dialing in Your Machine
Before you touch your actual project, always test on a piece of scrap metal of the same thickness.
- Start with the chart: Most welders include a settings chart inside the wire feed compartment. Use this guide to set the voltage and wire-feed speed based on your material thickness and wire size.
- Fine-tune by sound and sight: A properly adjusted MIG welder produces a steady, crackling sound (similar to frying bacon). If the weld bead looks tall and uneven (“cold”), try increasing the voltage slightly or lowering the wire feed speed. If the arc spits and pushes the gun back, your voltage is likely too high.
Using Stitch Welding Method
This is the most effective way to prevent burn-through and warping. Avoid running one long, continuous bead. Instead, build the seam with short, separate welds.
- Make a small tack: Begin with a short tack weld, about 1/2 inch long. Pull the trigger, form a small puddle, then release.
- Stop and cool: Pause after each tack. Let it cool for a few seconds to control the heat.
- Jump to a new spot: Move a few inches away and make another short weld.
- Spread the heat: Keep repeating this process, spacing your welds along the seam. This distributes heat evenly rather than concentrating it in one spot, preventing warping.
- Connect the dots: Once the seam is held together with tacks, go back and fill the gaps using the same short stitch method. This gives you a solid, strong seam with less heat buildup.
Gun Angle and Travel Direction (Push Technique)
For thin materials, the “push” technique is generally preferred. This means you angle the gun slightly and push it away from the finished weld bead. This technique tends to produce a slightly less penetrating, flatter, wider bead, which helps dissipate heat and further reduces the risk of burn-through.
Important Equipment for MIG Welding
Your success in welding thin metal starts with the right setup. While the basic components are the same for any MIG job, there are specific considerations for working with delicate materials.
Welding Machine (Power Source)
This is the heart of your setup. It supplies the power and drives the wire feeder. For thin sheet metal, control matters more than raw power. Smaller 120V welders, often referred to as hobby or DIY machines, work very well because they operate at the lower amperage required to prevent burn-through.
MIG Gun
This is the handheld tool you use to direct the wire and gas. When you pull the trigger, the wire feeds, the gas flows, and the machine provides power. A lightweight, comfortable gun makes it easier to stay steady and maintain control on thin panels.
Shielding Gas
For thin steel sheet metal, the standard gas is C25 (a 75% argon/25% CO2 mixture). This blend provides smooth arc control, steady puddle flow, and minimal spatter, making it ideal for clean work such as auto body repairs.
Ground Clamp
The ground clamp completes the electrical circuit. Attach it to a clean, bare metal surface. Poor ground conditions lead to an unstable arc and uneven heat, which can quickly damage thin metal.
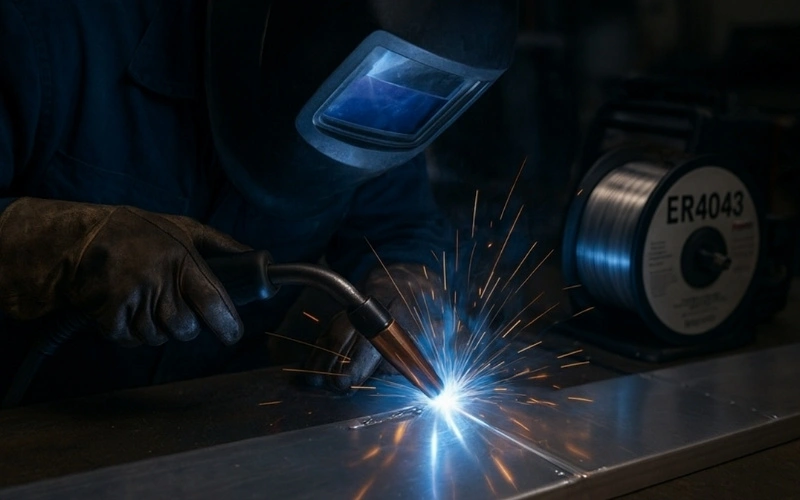
Consumables (The Wire)
This is one of the most critical factors for welding thin metal. You must use a small-diameter wire. The most common sizes are 0.023 or 0.024 inch (0.6mm). A thinner wire requires less energy to melt, which gives you significantly more control over your heat input. Using thicker wire, such as 0.030 or 0.035 inch, generates excessive heat and material, making it nearly impossible to weld thin panels without causing damage.
Common Mistakes When MIG Welding Thin Metal
Learning to troubleshoot is a huge part of welding. Here are the most common issues you’ll face with thin metal and how to solve them.
Burn-through
Burn-through is one of the most common problems when MIG welding thin metal. Because the material is so thin, excessive heat can quickly melt through the base metal and create holes in the joint.
- Cause: Too much heat input. This often occurs when voltage or amperage settings are too high, travel speed is too slow, or the welder runs a long, continuous bead that allows heat to build up in one area. Large wire diameters can also increase heat input and make burn-through more likely.
- Solution: Lower the voltage and wire feed speed slightly, and increase your travel speed to reduce heat concentration. Use short stitch welds or tack welds instead of a continuous bead to control heat buildup. Choosing a smaller wire diameter (such as 0.023 in) can also help improve control when welding thin sheet metal.
Warping
Thin sheet metal is highly sensitive to heat, and uneven heat distribution during welding can easily cause distortion or warping of the workpiece.
- Cause: Heat accumulates in one location for too long, causing the metal to expand unevenly. When the metal cools, it contracts and pulls the material out of shape. This problem is more likely to occur when long weld beads are applied or when the workpiece is not properly secured.
- Solution: Use the stitch welding technique and move along the seam gradually to distribute heat more evenly. Allow the metal to cool briefly between welds to minimize distortion. Clamping the workpiece firmly to a flat surface or using fixtures can also help maintain proper alignment during welding.
“Bird Dropping” Welds
“Bird dropping” welds refer to weld beads that appear tall, rounded, and poorly fused to the base metal. These welds often indicate that the welding parameters are not properly balanced.
- Cause: The wire feed speed may be too high for the selected voltage, preventing proper melting and fusion of the filler metal. It can also occur when the welding gun moves too quickly, which prevents a stable weld puddle from forming.
- Solution: Reduce the wire feed speed or slightly increase the voltage to improve arc stability. Adjust your travel speed so the weld puddle has enough time to form and penetrate the base metal. Maintaining a consistent torch angle and steady hand movement will also help produce smoother, properly fused weld beads.
Excessive Weld Spatter
Excessive spatter is another common issue when MIG welding thin metal. It occurs when small droplets of molten metal scatter around the weld area, creating a messy appearance and requiring additional cleanup.
- Cause: Spatter often results from incorrect voltage and wire feed speed settings. It can also occur when the shielding gas mixture is not suitable, the contact tip is worn, or the welding gun angle is inconsistent.
- Solution: Adjust the voltage and wire feed speed so they are properly balanced. Use the recommended shielding gas mixture (such as 75% argon and 25% CO₂ for mild steel) and maintain a steady gun angle during welding. Regularly inspect and replace worn contact tips to keep the arc stable.
Lack of Fusion
Lack of fusion occurs when the weld metal does not properly bond with the base metal. Although the weld bead may appear acceptable on the surface, the joint may be weak and prone to failure under stress.
- Cause: This problem usually occurs when travel speed is too fast, heat input is too low, or the welding gun angle prevents proper penetration into the joint. Poor joint preparation or gaps between materials can also reduce fusion.
- Solution: Slow down the travel speed slightly and increase voltage if necessary to improve penetration. Ensure proper joint fit-up and maintain a consistent torch angle so the arc reaches both sides of the joint. Practicing controlled, steady movement helps achieve better weld fusion.
Poor Shielding Gas Coverage
Proper shielding gas coverage is essential for protecting the weld pool from atmospheric contamination. Without adequate shielding, weld defects such as porosity and weak welds can occur.
- Cause: This issue may result from low gas flow, leaks in the gas hose, or holding the welding gun too far from the workpiece. Welding in windy environments can also disrupt the shielding gas flow.
- Solution: Check that the gas flow rate is set correctly and inspect the gas hoses and fittings for leaks. Keep the welding gun at an appropriate distance from the workpiece and maintain a steady angle to ensure proper gas coverage. When working outdoors, use barriers or shields to protect the weld area from wind.
Settings and Parameters for Thin Metal
These settings are practical starting points for short-arc MIG welding in a draft-free environment. Always test on a piece of scrap from your project before welding the actual workpiece. Use a push angle of 10-15°, a contact-tip-to-work distance (CTWD) of 6-10 mm, and avoid wide weaving – keep motion minimal on thin sheets to prevent distortion.
Steel (24-16 Gauge)
We recommend using the ER70S-6 wire (0.023 inch).
| Gauge (approx. mm) | Voltage (V) | WFS (ipm) | Technique Notes |
| 24 ga (0.6 mm) | 16.0-16.5 | 180-220 | 0.5s trigger stitches; use copper backing to absorb heat |
| 22 ga (0.8 mm) | 16.5-17.5 | 220-260 | Short stitches; “connect-the-dots” technique; skip around joints |
| 20 ga (0.9 mm) | 17.0-18.0 | 260-300 | Slightly longer stitches possible; watch for panel distortion |
| 18 ga (1.2 mm) | 17.5-18.5 | 300-340 | Short continuous runs are possible; keep weave minimal |
| 16 ga (1.6 mm) | 18.0-19.0 | 340-380 | Stringer beads 20-40 mm long; stagger welds to distribute heat |
Key Tips:
- Start at the lower end of the voltage range and increase only if necessary.
- Keep welds short and intermittent on thin sheets to avoid warping.
- Copper backing bars help absorb excess heat and reduce burn-through.
Stainless Steel
Use ER308L (or appropriate grade). Wire: 0.023-0.030 inch (0.6-0.8 mm). Gas: Argon with 1-2% CO2 or O2, or a tri-mix for short-arc.
| Thickness | Voltage (V) | WFS (ipm) / Wire | Notes |
| 0.8-1.0 mm (22-20 ga) | 16.5-17.5 | 180-240 / (0.023 inch) | Keep heat input low; minimize heat tint; back purge roots where needed |
| 1.2 mm (18 ga) | 17.5-18.5 | 220-280 / (0.023-0.030 inch) | Use short stitches; immediate post-clean if corrosion resistance is critical |
Tip: Reduce reactive gases (CO2, O2) to preserve corrosion resistance. For food-grade or chemical environments, control the heat tint carefully.
Aluminum
Use ER4043 wire (0.030-0.035 inch). Gas: 100% Argon. Spool gun or push-pull gun recommended. Always use the push technique.
| Thickness | Mode | Voltage/Program | WFS/Trim | Notes |
| 1.0-1.5 mm | Pulsed | Select 4043/Ar program | Adjust trim per OEM (+/- 0.1-0.3mm) | Use stitch or short beads; fast travel; maintain cleanliness |
| 1.5-2.0 mm | Pulsed or smooth short spray (if available) | Select 4043/Ar program | Adjust trim per OEM (+/- 0.1-0.3mm) | Copper backing helps on edges; allow cooling between welds |
Tip: Without pulsed, aluminum thin‑gauge MIG is unforgiving. If your machine doesn’t support pulsed MIG, practice extensively on scrap and consider TIG welding for critical applications.
Why is MIG the Best Choice for Thin Metal?
When we compare MIG welding to TIG or stick welding, it remains the best choice for thin materials, especially for beginners. Here is a quick comparison to explain why.
| MIG welding | TIG welding | Stick welding | |
| Heat control | Excellent. Wire speed and voltage are easily adjustable for precise, low heat input | Excellent, but much slower, and requires significantly more skill to manage | Poor. It’s very difficult to control heat input, making it extremely prone to burn-through on thin metal |
| Speed | Fast. The point-and-shoot nature is highly efficient for stitching panels together | Very slow. The process is meticulous and time-consuming | Slow, with constant stops to change rods |
| Ease of use | Easiest. The simple operation makes it perfect for beginners tackling sheet metal | Very Difficult. Requires two-handed coordination and often a foot pedal | Difficult on thin material; not recommended |
| Result | Produces clean welds that require only light grinding or finishing | Creates perfect, beautiful welds, but takes significant time and skill | Leaves behind messy welds covered in slag; not suitable for auto body or cosmetic work |
Read more: What is stick welding and how is it applied?
Conclusion
MIG welding is a versatile and accessible process, and with proper settings and technique, it works well for thin metals like steel, stainless steel, and aluminum. By controlling voltage, wire speed, and travel, and by applying methods such as stitch welding, short beads, or copper backing, you can avoid burn-through and warping and create clean, strong welds. Whether for automotive repair, sheet metal fabrication, or DIY work, mastering MIG welding on thin materials builds both skill and confidence. Start practicing today on scrap metal and refine your settings until you achieve consistent, high-quality results.
FAQs
The absolute best choice is 0.6mm solid wire. This small diameter is the key to controlling heat and preventing burn-through on thin automotive panels (typically 18-22 gauge).
Always follow your welder’s settings chart. For 22-gauge steel with 0.023-inch wire, use low voltage and wire speed. Test and adjust on scrap before welding your project.